Tutorials
This section provides step-by-step tutorials to help you get started with Burbuja.
Prerequisites
Burbuja installed and working (see Getting Started) along with all required, recommended, and optional dependencies, including:
CuPy
Note
We are assuming that you have installed Burbuja via Pip, thus allowing you to use it as a command in the terminal. If you have installed via source, then you will need to provide the path to burbuja.py, e.g. “python ~/Burbuja/Burbuja/burbuja.py”.
Tutorial 1: Basic Bubble Detection
This tutorials walks you through detecting a bubble within a simple PDB file.
You may start by downloading the following files, which contain a solvated trypsin/ benzamidine system with and without bubbles, respectively:
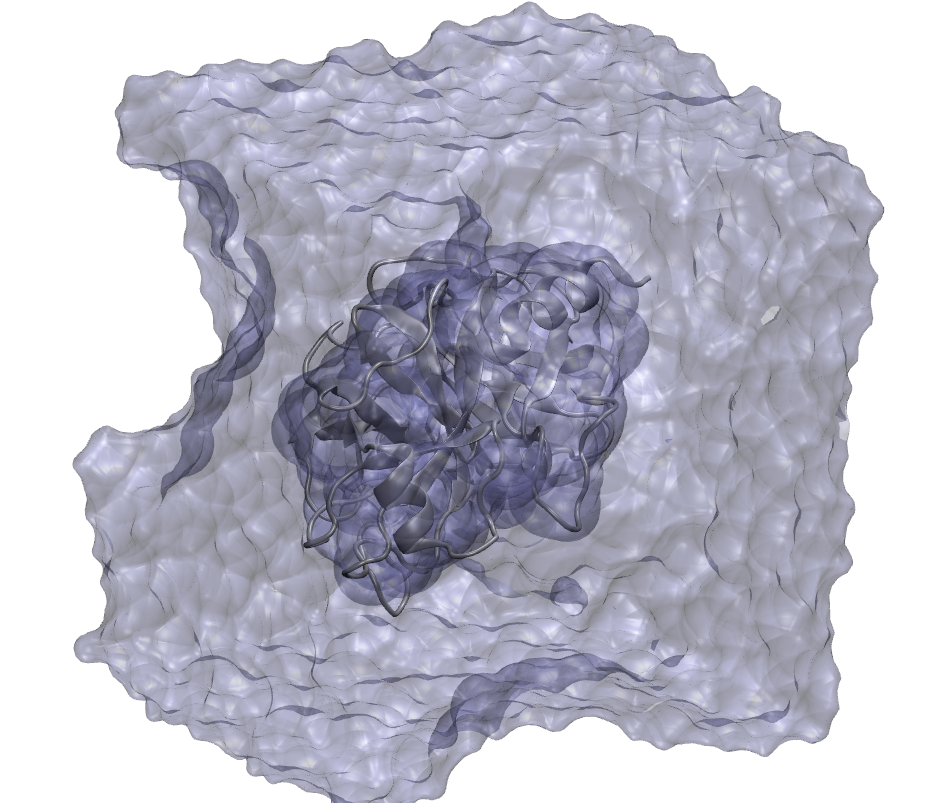
Figure 1: This solvated box containing the trypsin/benzamidine system has been improperly solvated and contains a bubble.
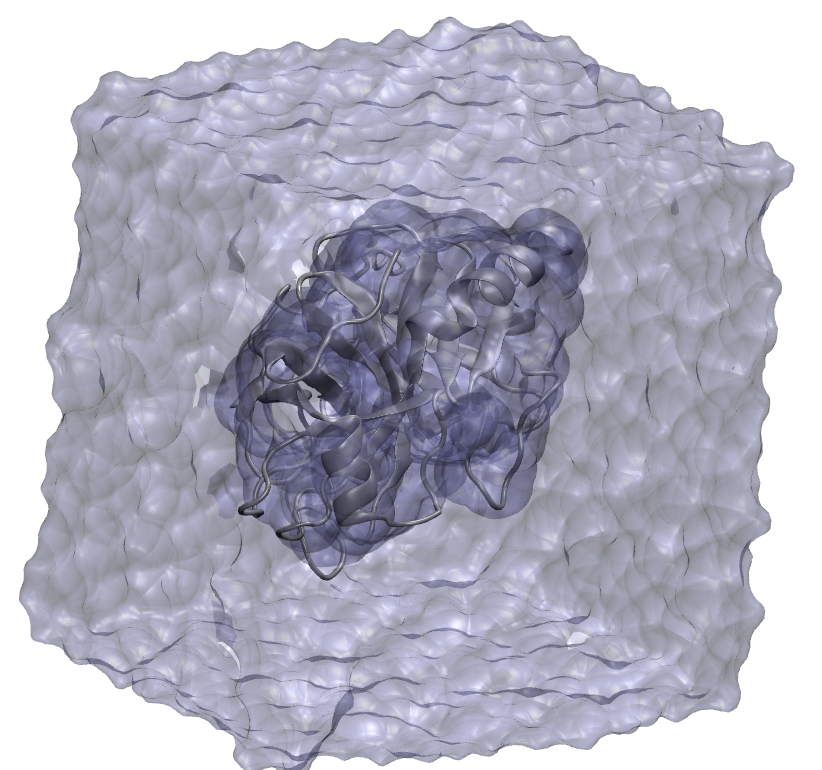
Figure 2: In contrast to Figure 1, this trypsin/benzamidine system contains no bubbles.
Let us start by seeing whether Burbuja detects bubbles in these structures:
burbuja tryp_ben_bubble.pdb
The output should indicate the time to complete the calculation, and confirm the existence of a bubble. Next:
burbuja tryp_ben_no_bubble.pdb
No bubble should be detected.
Using Burbuja from the command line can be that easy!
Tutorial 2: Bubble Shape and Size
Next, for the structure that has a bubble, we will detect its shape and size. This is done with the ‘-d’ argument.
burbuja tryp_ben_bubble.pdb -d
This time, the program prints several bubble volumes, and writes several files, the first one named ‘tryp_ben_bubble_bubble_frame_0.dx’, which you may load into a molecular visualizer such as VMD or NGLView.
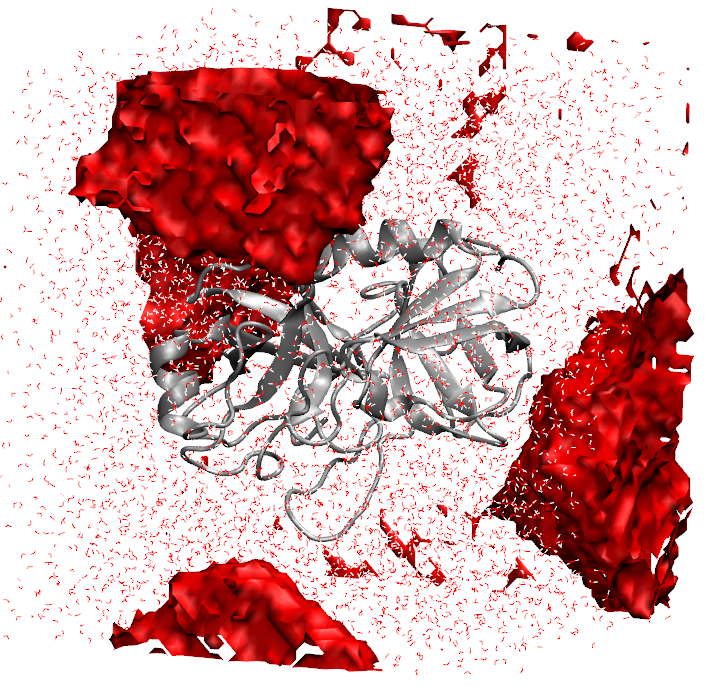
Figure 3: Bubble size and location are shown in red by visualizing the resulting DX files.
Tutorial 3: Trajectories, Alternative File Formats, and GPU Acceleration
In this tutorial, we will start by detecting bubbles in a trajectory. Please download the following files:
Burbuja allows one to load structures in a variety of formats, basically anything supported by MDTraj (https://mdtraj.org/). In this case, we will load a prmtop/dcd file pair to detect bubbles in the trajectory:
burbuja tb_traj.dcd -t tryp_ben.prmtop -d
This command will print out the volumes of the bubbles for each frame, where detected.
Note
If the previous command were run without the ‘-d’ argument, it would simply detect whether a bubble was found anywhere in the trajectory.
Next, let’s try GPU acceleration (If you have installed CuPy) with the ‘-c’ argument:
burbuja tb_traj.dcd -t tryp_ben.prmtop -d -c
The command should finish much more quickly.
Tutorial 4: Using the Burbuja API
This tutorial may also be run with the accompanying Jupyter Notebook located at: ~/Burbuja/Burbuja/jupyter_notebooks/api_tutorial.ipynb within the Github repository: (https://github.com/Abrahammc90/Burbuja.git).
The need may arise to use Burbuja from within a Python script (for a workflow, for instance). Hence why an API is available for using Burbuja. Complete the steps of this notebook to see examples of how to use Burbuja’s API.
NOTE: You will need to install Burbuja and its dependencies, as well as NGLView:
# Run this in the terminal
pip install nglview
# Run this and all subsequent code in Python
# paths - modify as needed
hsp90_structure_path = "~/Burbuja/Burbuja/tests/data/hsp90.pdb"
tryp_ben_dcd_path = "~/Burbuja/Burbuja/tests/data/tb_traj.dcd"
tryp_ben_prmtop_path = "~/Burbuja/Burbuja/tests/data/tryp_ben.prmtop"
# Imports and other preliminaries
import os
import time
import mdtraj
import nglview
from Burbuja import burbuja
hsp90_structure_path = os.path.expanduser(hsp90_structure_path)
tryp_ben_dcd_path = os.path.expanduser(tryp_ben_dcd_path)
tryp_ben_prmtop_path = os.path.expanduser(tryp_ben_prmtop_path)
Tutorial 4.1: Simple Bubble Detection
First, we will use the API to simply detect whether a bubble exists in a HSP90 solvated structure.
hsp90_contains_bubble = burbuja.has_bubble(hsp90_structure_path)
print("HSP90 structure contains bubble:", hsp90_contains_bubble)
No bubble is found in this structure.
Tutorial 4.2: Bubble Detection on a Trajectory
Next, we will see how to load a MDtraj trajectory object and run it through Burbuja with some alternative settings, like GPU acceleration.
traj_structure = mdtraj.load(tryp_ben_dcd_path, top=tryp_ben_prmtop_path)
traj_contains_bubble = burbuja.has_bubble(traj_structure)
print("Trajectory contains bubble:", traj_contains_bubble)
Aha! We have found a bubble. Let’s see where and how big…
The “dx_filename_base” argument defines the base name for the DX files, and indicates to Burbuja that we want to write the bubbles to DX.
dx_filename_base = "traj_bubble"
traj_contains_bubble = burbuja.has_bubble(traj_structure, dx_filename_base=dx_filename_base)
It looks like Burbuja wrote 6 frames. Let’s load them and visualize the resulting bubbles.
view_list = []
# Must be reloaded for visualization because Burbuja changes the MDTraj object
new_traj_structure = mdtraj.load(tryp_ben_dcd_path, top=tryp_ben_prmtop_path)
for i in range(6):
    dx_filename = f"{dx_filename_base}_frame_{i}_bubble_0.dx"
    traj_structure_this_frame = new_traj_structure[i]
    view = nglview.show_mdtraj(traj_structure_this_frame)
    view.add_component(dx_filename)
    view.clear_representations()
    view.component_1.clear_representations()
    view.add_cartoon("protein")
    view.add_licorice("water")
    view.component_1.add_surface(opacity=0.25, wireframe=False, color="red", isolevel=0.5)
    view_list.append(view)
for i, view in enumerate(view_list):
    print(f"Iteration: {i}")
    display(view)
You should be able to see the bubble locations highlighted in red.
If we wanted the bubble detection to go faster, we could use GPU acceleration with CuPy:
dx_filename_base = "traj_bubble"
time_start = time.time()
traj_contains_bubble = burbuja.has_bubble(traj_structure, dx_filename_base=dx_filename_base, use_cupy=True)
time_end = time.time()
elapsed_time = time_end - time_start
print(f"Bubble detection completed in {elapsed_time:.2f} seconds.")
Tutorial 4.3. Accessing Bubble Objects
If you want more low-level access to information Burbuja obtains about structures, the burbuja() function returns a list of Bubble objects that have additional attributes and methods for analysis.
from Burbuja.modules.base import DEFAULT_MINIMUM_BUBBLE_VOLUME
bubbles = burbuja.burbuja(traj_structure)
for i, bubble in enumerate(bubbles):
    if bubble.total_bubble_volume > DEFAULT_MINIMUM_BUBBLE_VOLUME
        print(f"Frame: {i}")
        print(f"Bubble detected with volume: {bubble.total_bubble_volume:.3f} nm^3.")
        print(f"System volume: {bubble.total_system_volume:.3f} nm^3.")
        bubble_percentage = 100.0 * (bubble.total_bubble_volume / bubble.total_system_volume)
        print(f"Bubbles occupy {bubble_percentage:.3f} % of the system, by volume.")